Getting started▼
Starting position
Ask for a “Sit” or a “Down”. The exercise begins once your dog is settled.
The signal
Give the cue “Stay!” together with the “STOP” hand signal (palm facing their nose). Take your hand away immediately so it does not become a visual crutch.
Reversing the focus▼
It is not up to you to be 100% focused on your dog, but up to your dog to be focused on you.
Look elsewhere
Turn your gaze away and look around you. Your dog learns that the cue holds even when you are not “watching” them.
Hand from above
When you reward, bring your hand in from above and give the treat at nose level.
Confirming
As soon as your dog receives the reward while staying still, say “Stay!” to reinforce it.
The 3 Ds rule▼
Vary these three dials to build reliability:
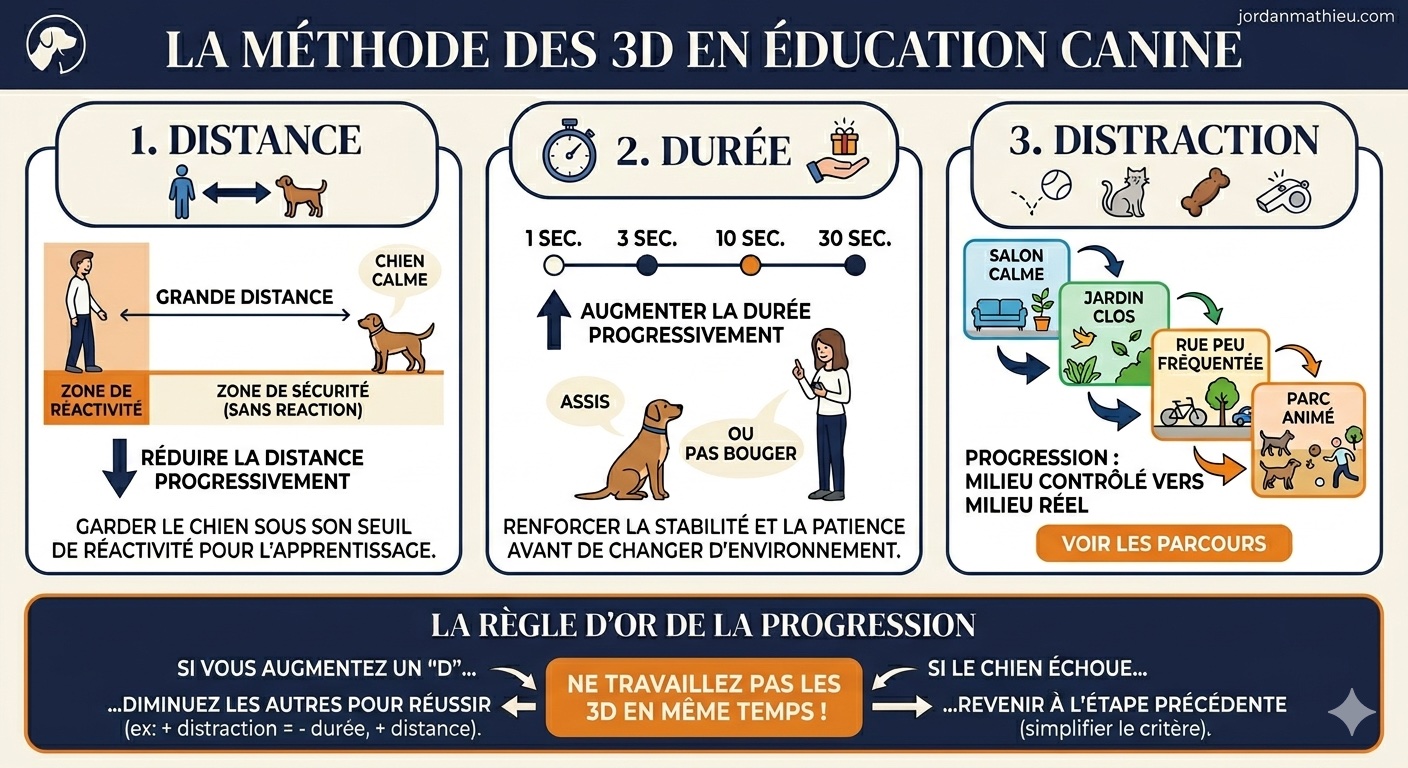
Summary diagram — jordanmathieu.com
Duration
Increase the waiting time before the reward or the release.
Distance
Move away, turn your back, go into another room.
Distractions (stimuli)
Drop treats on the floor, throw a ball, run past your dog. Your dog must stay rock solid.
Handling mistakes▼
If your dog breaks position: a firm “Uh-uh!” at the exact moment. Firmly take them back to the exact spot. Do not repeat the cue while putting them back.
The release + key points▼
The exercise only ends when you decide. Release word: “OK!”, “GO!” or “All done!”.
- The high hand: Bringing the reward in from above stops your dog from getting up to take it.
- Self-control: By dropping balls or food, you work on your dog's instincts.
- Consistency: Be demanding about the exact spot when putting your dog back. A few centimetres matter.